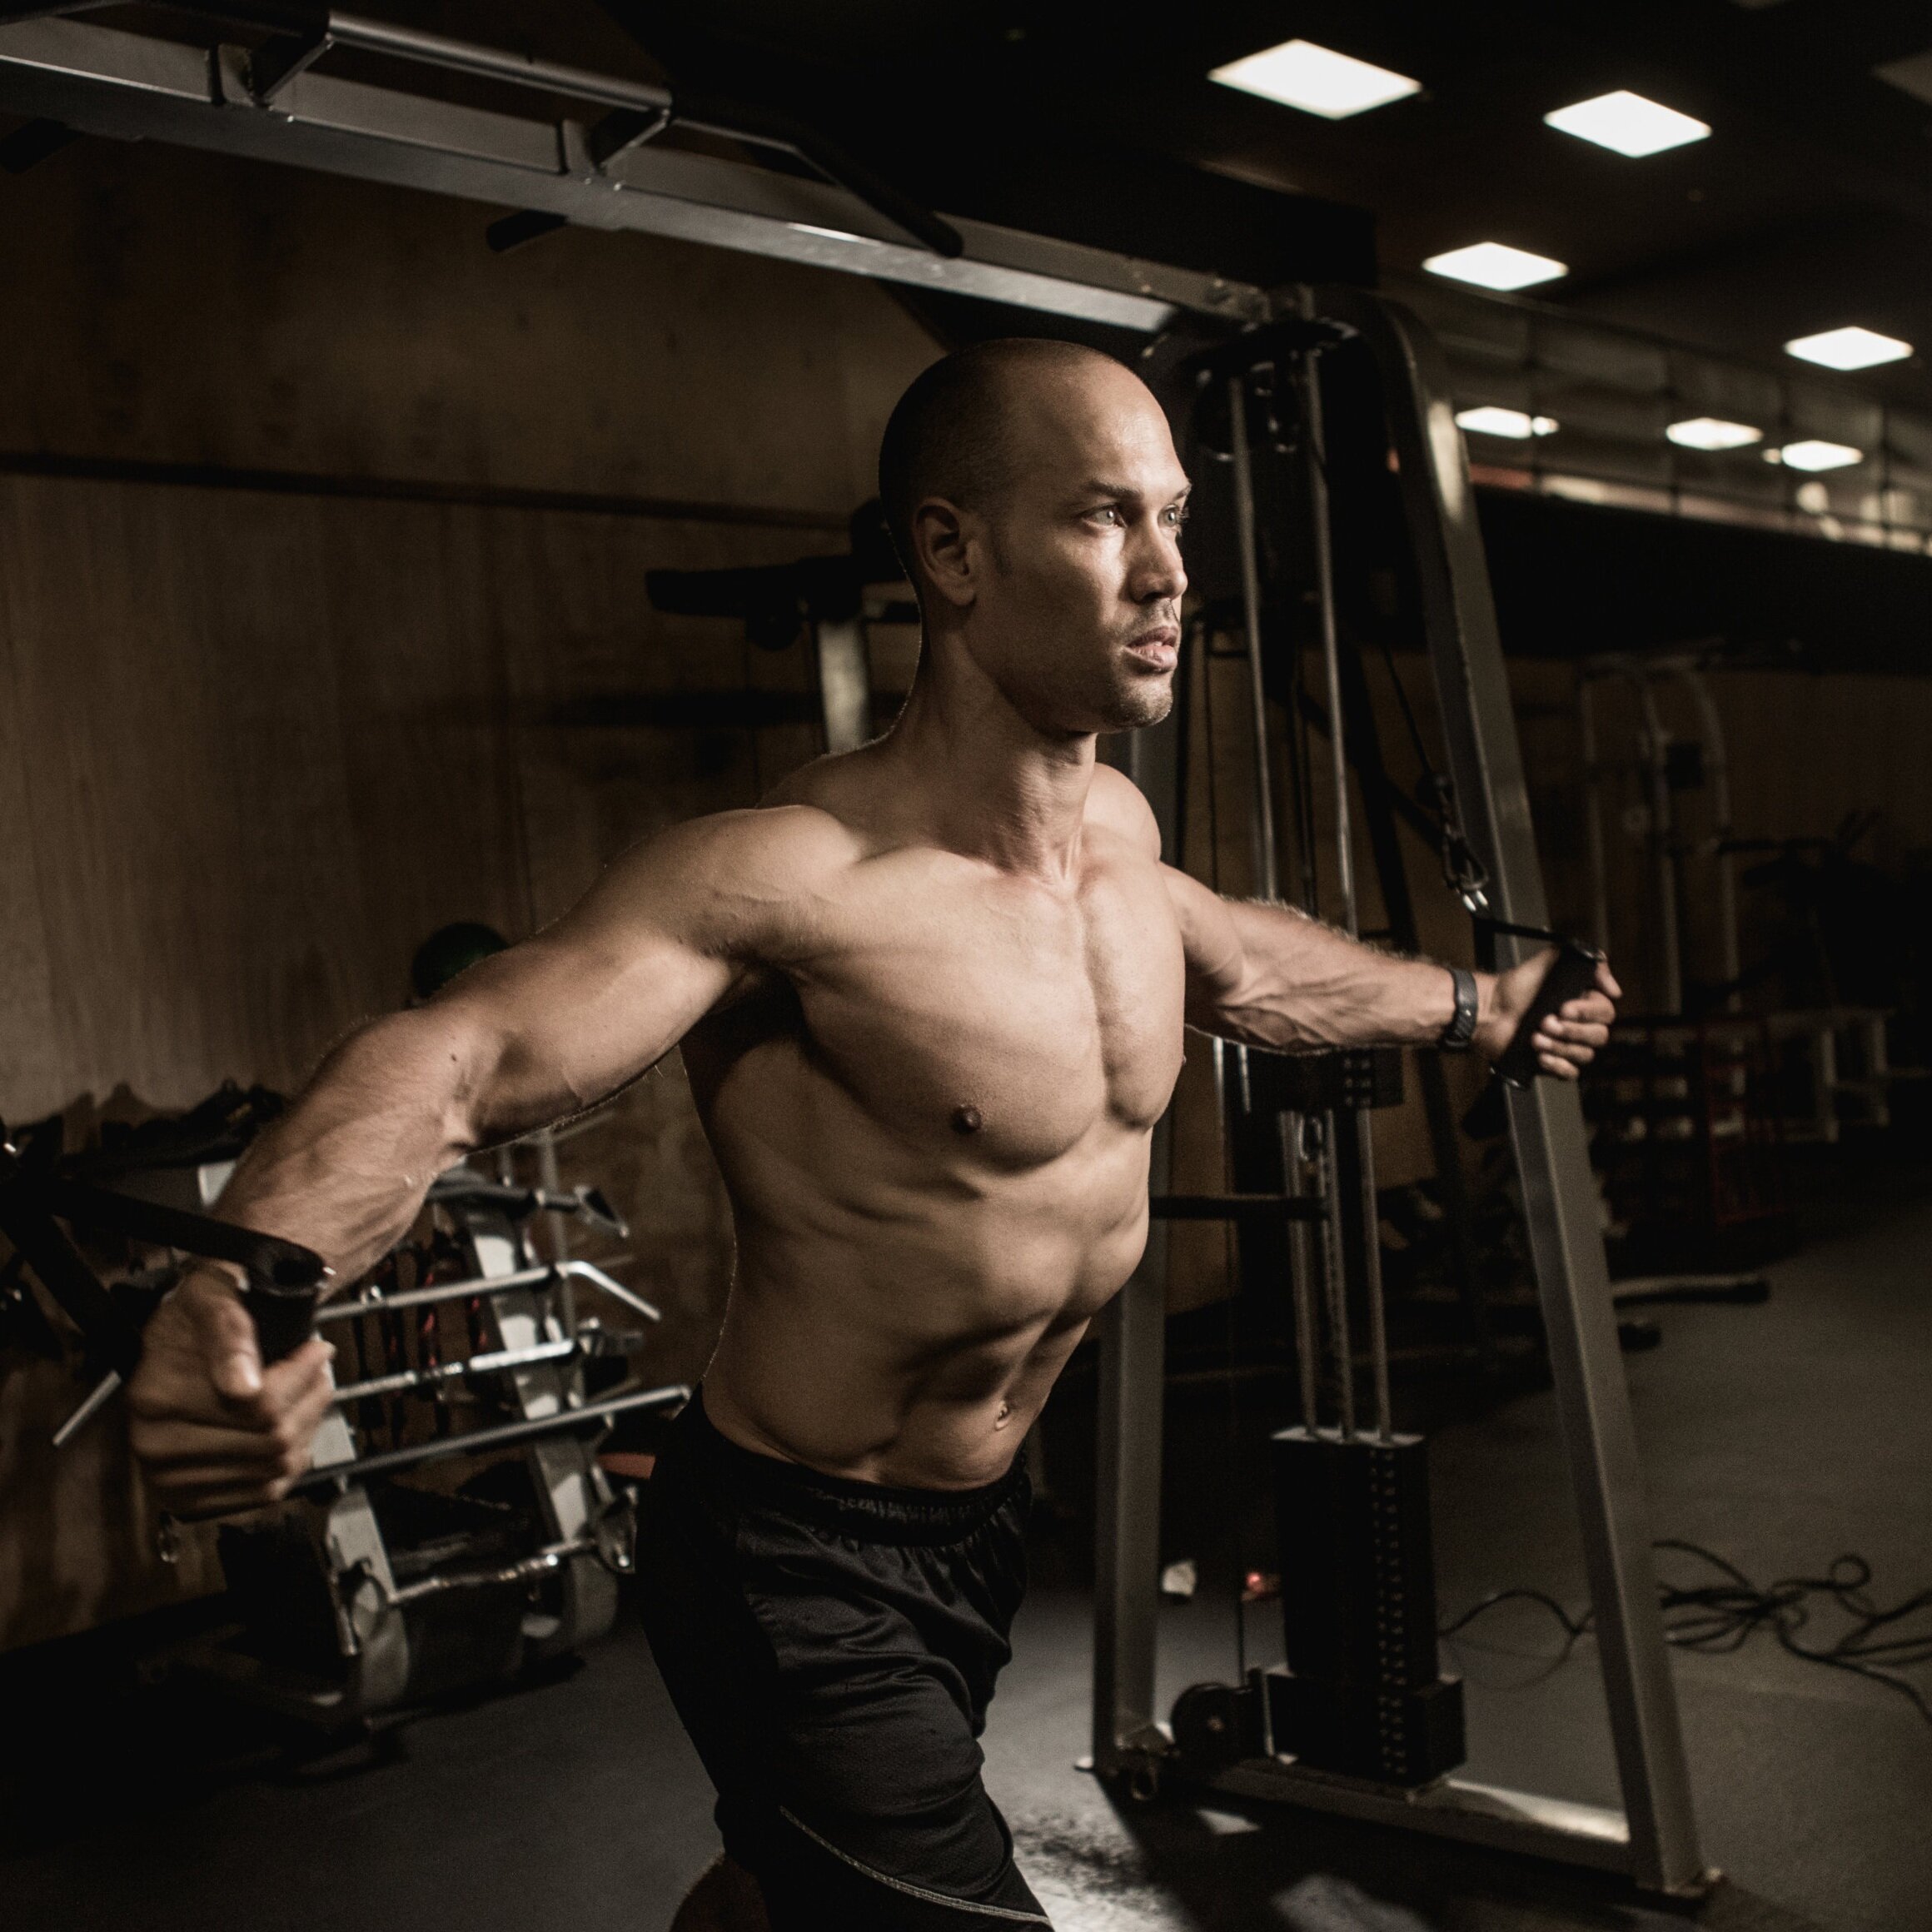
KEY CHEST EXERCISE FOR CHEST AESTHETICS AND DEVELOPMENT
USE THESE MASTER TIPS FOR PROGRAMMING AND EXECUTING THE CABLE CROSSOVER FLY!
EXECUTION GUIDELINES FOR THE CABLE CROSSOVER FLY
IN ORDER TO GET THE MOST OUT OF ANY EXERCISE, EXECUTION IS KEY. FOLLOW THESE STEPS, FOR THE CHEST CABLE CROSSOVER AND LEAVE THE GUESSWORK BEHIND!
DECIDE WHICH REGION OF YOUR CHEST YOU WANT TO FOCUS ON - LOWER CHEST, OR MID CHEST
Knowing whether you want to use cable crossover fly to target the lower or mid chest will determine how to position the pulleys (if you’re using a set which is adjustable), how you get set up to do the set, as well as the path of motion of your arms.
For lower chest, you will keep the pulleys above shoulder height, and you will follow a path of motion where your hands with arms outstretched will be at about head height.
For mid chest, the pulleys will be lower, as will the height of your hands at the end of the movement - close to shoulder height.
2. WORK ON YOUR STABILITY IN ORDER TO MAXIMIZE CONTRACTION AND MINIMIZE INJURY!
Increase force or tension generated by your chest muscles, really, the pectoralis major by maximizing stability at your shoulder. In general, a high degree of stability around joints is critical for being able to generate tension with target muscles. In this case, the pec major, and the shoulder joint as this is the joint at which most motion occurs during the chest cable crossover fly.
To generate this stability, you will need to forcefully contract various back muscles, including the lats (latissimus dorsi), mid-traps (transverse fibers of trapezius), and to some degree the teres and rhomboid group. This will allow you to hold your shoulder blades (aka scapula) in a position where they are pulled together and pulled downward toward your hips (retracted and depressed position)
Next, be sure to stabilize your spine using your deep core muscles. Pull your core inward forcefully to maintain rigid stability through your torso throughout the set. Avoid arching or hyperextending your back; paying special attention not to strain the lower back.
Finally, be sure that you are stable at your hips and through your legs. A split stance with one foot in front of the other, is typically the preferred stance for the chest cable fly.
3. BEGIN THE SET ON THE NEGATIVE OR ECCENTRIC PORTION OF THE EXERCISE
Once your setup and stability are dialed in, start with the negative portion of the exercise when your hands, holding the handles are outstretched in front of you. From here, using tension in your pecs, your goal is to allow your arms along an outward and upwardly arcing path of motion with arms slightly bent at the elbow. You want to remain within the same plane as you execute this movement, and aim to keep shoulder blades fully depressed and to retract the scapulae as you move outward.
4. END THE NEGATIVE AT THE LIMIT OF YOUR ACTIVE RANGE OF MOTION
Your active range of motion, or AROM is limited by the ability of posterior muscle from your triceps on one arm through your rear delts, traps through to the triceps on the other arm to pull your arms backward and up. Beyond that point, you’re likely to be transitioning tension away from your pecs and onto your joints and other muscles. This not only reduces the benefit to the pecs of the exercise, but exposes you to an increased risk for injury.5. PAUSE AND ISOMETRICALLY CONTRACT THE PECS BEFORE BEGINNING THE CONCENTRIC PHASE
Before beginning the concentric portion of the fly - really, the portion that everyone is focused on - driving your arms inward and downward along the reverse path of motion within the same plane as the eccentric, be sure to contract your pec muscle without moving; that is, and isometric contraction.
5. PERFORM THE CONCENTRIC WITH FOCUSED TENSION IN THE PECS AND STABILIZED SHOULDERS
As with the eccentric, your goal is to ensure that the concentric portion of the exercise is done using tension generated by the pecs. Avoid engaging the front delt to any significant degree. In order to maximize tension generation by your pecs, ensure your shoulder blades remain pulled back and down.
6. PAUSE AND ISOMETRICALLY CONTRACT YOUR PECS AS FORCEFULLY AS POSSIBLE AT THE END OF THE CONCENTRIC PHASE
Continue to contract and shorten the pecs as you drive your arms across your body and downward until your biceps are forcefully pressed against the sides of your pecs, and your pecs are fully shortened. Right at the end of the movement, with the pecs in the fully shortened position, you have the greatest opportunity to stress the muscle in the shortened range, using this exercise. Take advantage of that benefit by maintaining this contraction for a second or two before beginning the next rep
PROGRAMMING APPROACHES FOR THE CABLE CROSSOVER FLY
DEPENDING ON YOUR OVERALL TRAINING GOALS, WHERE YOU ARE IN YOUR MACRO AND MICROCYCLES OF TRAINING, THE POSITION AND VARIABLES FOR THE CHEST CABLE CROSSOVER FLY WILL NEED TO BE VARIED
IN MOST CASES, IT WILL BE BEST TO PROGRAM NEAR TO THE START OF YOUR WORKOUT
When this exercise is performed standing between the columns of a cable crossover station, as described in the execution guidelines above, you need to have sufficient energy to generate high levels of internal stability in order to perform the exercise well, generate high amounts of force or tension with the pecs and minimize the impact to joints and risk for injury. Therefore, this exercise is well-suited for the 2nd or 3rd position within a chest-focused workout.
Generally, you may want to first perform an exercise where you are able to produce absolutely maximal tension in the mid-range of the pec strength curve such as with a heavy pressing movement while stabilized by a bench - such as a flat barbell bench press, or dumbbell bench press, or an incline or decline bench press.
In addition, you will need to consider positioning when you use this exercise as part of a larger upper body workout, to ensure that you are able to get the greatest benefit for your chest, while not neglecting the need to effectively train the other muscle groups you plan to, during your workout.
VARY INTENSITY OR WEIGHT / LOAD AND REP RANGE BASED ON YOUR GOAL OF ENDURANCE VS HYPERTROPHY VS STRENGTH
If your goal is increasing muscle mass, or muscle hypertrophy, then use a weight that’s between about 65-85% of your 1 rep max or 1RM. Perform a few sets (2-4) of between 8-15 reps. Again the specific number of reps will be determined by the exact position within your workout, where you are on the endurance-hypertrophy-strength continuum and external factors such as energy and stress levels and so on.
FOR MORE DETAILS, CHECK OUT THIS VIDEO ON YOUTUBE WHERE I’VE EXPANDED ON SETUP, EXECUTION AND PROGRAMMING
COMMENTS & QUESTIONS
I’d encourage you to add any comments you may have, as well as include any questions that come to mind. I would love to hear your thoughts and help with responses to any queries.
Aloha!
Jason
DO YOU HAVE ANY QUESTIONS? GET IN TOUCH WITH ME NOW!


We all have a sense that highly-processed foods aren’t exactly healthy for us. BUT, did you know there is a classification of foods (really products) that are called Ultraprocessed Foods orUPFs?
Chances are you aren’t aware of what this specifically means and the types of additives that are included during processing.
In Part 1 of this 2 Part Blog, we’ll review what ultraprocessed foods are, the top 3 reasons why you eat ultraprocessed foods in the first place, the 4 keys to grocery shopping to minimized process food consumption and how ultraprocessed foods have become a part of our culture - from the Hawaiian perspective.
Enjoy!